How to Repair a Gas Water Heater All By Yourself: Learn Here!
Nobody gives a hoot about their water heater until that first icy blast hits your bare skin at 6 AM. Then suddenly it’s a household emergency!
Fact bomb: As per reports, water heating gobbles up roughly 18% of your home’s energy. That’s cash flowing straight down the drain every month. But here’s the kicker – most folks would rather fork over serious dough to some repair guy than get their hands dirty.
If we think about it, gas water heaters aren’t rocket science. These sturdy beasts can chug along for 10-15 years if you give ’em a little love. But when they start acting up? That’s when knowing how to repair a gas water heater becomes your secret weapon.
Fair warning though – we’re talking about a gas appliance here. One wrong move and you could be dealing with carbon monoxide (the silent killer), a house fire, or worst case, your neighbors finding pieces of your water heater in their yard. If you catch even a whiff of gas or feel in over your head, kill the gas supply and call in the pros. No repair job is worth risking your skin.
We’ll be straight with you. Some water heater problems are genuinely simple fixes that anyone with basic tools can handle. Others? You’d be a fool to tackle them yourself. In the following sections, we’ll help you figure out which is which. So stay with us!
Recognizing the Warning Signs of a Faulty Gas Water Heater
Water heaters don’t just explode one fine Tuesday without dropping hints first. They’re like that passive-aggressive roommate who keeps sighing louder and louder until you finally ask what’s wrong.
Want to know how to repair a gas water heater? First, you have to recognize when the thing needs attention. Pay attention to these red flags, and you might save yourself from a mid-shower catastrophe.
Your water heater’s basically begging for attention when:
- That morning shower feels more like standing in a lukewarm drizzle. Or worse, it’s playing temperature roulette, blasting you with scalding water one minute and frigid the next.
- Strange gurgling, popping, or banging sounds echo through your walls at odd hours. No, your house isn’t haunted – it’s probably sediment buildup turning your tank into a percussion instrument.
- Notice rusty water that looks like weak coffee coming from your hot taps? That’s your tank literally dissolving from the inside out.
- Puddles around the base? Unless you’ve got a dog with bladder issues, your tank’s probably sprung a leak.
- The pilot light that keeps going out despite your best efforts to relight it? That’s not normal, buddy.
- That weird rotten egg smell? Could be bacteria, but could also be a gas leak, and that’s when you drop everything and call for help.
Remember, catching these problems early means simple fixes. Ignore them, and you’ll be shopping for a new water heater while taking cold showers at your neighbor’s place.
Getting Your Hands Dirty: How to Repair a Gas Water Heater
Now that we’ve identified the signs that your water heater needs attention, let’s dive into the actual repair process. Understanding how to repair a gas water heater requires familiarity with its key components and the common issues that affect them. We’ll walk through the major components one by one, explaining what they do, how they fail, and most importantly, how to fix them.
Problem#1. Tackling Burner And Manifold Assembly Issues
The burner assembly is essentially where the magic happens – it’s where gas combustion creates the heat that warms your water. When this component develops problems, your water heater’s performance suffers dramatically.
What It Is and What It Does?
The burner/manifold assembly consists of the main burner, burner tubes, and the manifold that delivers gas to the burner. It’s the component responsible for creating the controlled flame that heats the water in your tank. A properly functioning burner produces a strong, steady blue flame that efficiently transfers heat to the water tank above it.
Recognizing Failure
Common signs of burner problems include:
- No gas reaching the burner
- Yellow or “lazy” flames instead of crisp blue ones
- Flames that lift off the burner ports
- Burner failing to ignite
- Sooty residue around the burner chamber
- Unusual odors during operation
The Fix: Cleaning and Replacing the Burner Assembly
If you’re experiencing burner issues, here’s how to repair a gas water heater burner problems:
- Safety first: Turn off the gas supply to the water heater and allow the burner chamber to cool completely.
- Access the burner: Remove the access panel and inner door to expose the burner assembly. Some models may require removing sheet metal screws or other fasteners.
- Inspection: Examine the burner for signs of corrosion, damage, or blockage. Pay particular attention to the burner ports where the flames emerge.
- Cleaning: In many cases, burner problems stem from dirt and debris. Use a soft brush and vacuum to clean the burner ports. For stubborn deposits, use compressed air to blow through the ports from the inside out. Be careful not to enlarge the ports.
- Checking gas supply: Verify that gas is reaching the burner properly. If the burner receives insufficient gas, check for kinked supply lines or partially closed valves.
- Replacement: If cleaning doesn’t resolve the issue or the burner shows significant damage, replacement is necessary. Burner assemblies are typically model-specific, so obtain the exact replacement part for your water heater model.
- Reassembly: Install the new burner, ensuring proper alignment with the manifold and pilot assembly. Secure all connections and restore access panels before testing.
- Testing: After reassembly, restore gas supply and test the burner operation, looking for proper blue flames and normal ignition.
Regular burner maintenance prevents many common issues and improves efficiency, extending the life of your water heater and reducing energy costs.
Problem#2. The Pilot Light Issues: Thermocouple Troubles and Solutions
The thermocouple is a simple but critical safety device in your gas water heater. When it fails, your pilot light won’t stay lit, and your heater won’t function at all.
What It Is and What It Does?
A thermocouple is a safety device consisting of two dissimilar metals that generate a small electrical current when heated by the pilot flame. This current powers an electromagnet that keeps the gas valve open. If the pilot light goes out, the thermocouple cools, the electrical current stops, and the gas valve closes automatically, preventing dangerous gas buildup.
Recognizing Failure
The primary symptom of thermocouple failure is a pilot light that won’t stay lit. You might be able to light the pilot, but as soon as you release the control knob, the flame extinguishes. In some cases, the thermocouple may work intermittently, causing the pilot to stay lit sometimes but not others.
The Fix: Thermocouple Replacement
Here’s how to repair a gas water heater with a faulty thermocouple:
- Turn off the gas: Set the gas control valve to the “Off” position and allow time for components to cool.
- Access the thermocouple: Remove the access panel and locate the thermocouple; a copper tube running from the gas control valve to the pilot light assembly.
- Disconnect the old thermocouple: Loosen the connection at the gas control valve using a wrench. Be careful not to over tighten when reinstalling.
- Remove the mounting bracket: The thermocouple is typically held in place near the pilot by a bracket or clip. Carefully remove this to free the thermocouple.
- Install the new thermocouple: Insert the new thermocouple into the bracket, positioning the tip in the correct location relative to the pilot flame (it should be in the upper third of the flame when lit).
- Reconnect to the gas valve: Hand-tighten the connection at the gas valve, then give it approximately a quarter-turn with a wrench. Overtightening can damage the connection.
- Test: Restore gas supply, relight the pilot following the manufacturer’s instructions, and verify that it remains lit after releasing the control knob.
Thermocouples are inexpensive (typically $10-20) and relatively easy to replace, making this a high-value repair for homeowners learning how to repair a gas water heater.
Problem#3. Ignition System Repairs
Modern gas water heaters feature various ignition systems, from traditional standing pilots to electronic ignitors. Problems with these systems prevent your water heater from starting its heating cycle.
What It Is and What It Does?
The ignition system initiates combustion in the main burner. Traditional systems use a continuously burning pilot light, while newer models might use spark igniters or hot surface ignitors that activate only when heating is needed.
Recognizing Failure
Signs of ignition system problems include:
- Clicking sounds without ignition
- No spark or ignition attempt
- Pilot light that won’t light
- Burner that doesn’t ignite even with a functioning pilot
The Fix: Ignitor Maintenance and Replacement
If you’re dealing with ignition issues, here’s how to repair a gas water heater ignition system:
1. For standing pilot systems:
-
- Clear obstructions in the pilot orifice using compressed air or a fine needle
- Check pilot tube for kinks or damage
- Ensure proper gas pressure
- Clean the pilot assembly of any debris or corrosion
2. For electronic ignition systems:
-
- Inspect wiring connections for damage or loose connections
- Check for proper voltage to the ignitor (typically requires a multimeter)
- Clear any debris from the ignitor electrode
- Verify proper positioning of the spark gap
3. Replacing an electronic ignitor:
-
- Disconnect power to the water heater
- Remove access panels to reach the ignitor assembly
- Disconnect wiring connections (take a photo first to aid reassembly)
- Remove mounting screws and extract the old ignitor
- Install the new ignitor in the same position
- Reconnect wiring and restore power
4. Testing: After repair or replacement, test the ignition system through several heating cycles to ensure reliable operation.
Modern electronic ignition systems are more energy-efficient than standing pilots but involve more complex troubleshooting. Having a multimeter and basic electrical knowledge helps when tackling these repairs.
Problem#4. Control Valve Issues
The combination control valve regulates gas flow, water temperature, and safety shutoffs. It’s one of the most complex components of your water heater and requires careful attention when troubleshooting.
What It Is and What It Does?
The combination control valve integrates several functions:
- Gas pressure regulation
- Temperature sensing and control
- Pilot light control
- Safety shutoff mechanisms
It monitors water temperature and controls gas flow to the burner accordingly, maintaining your desired water temperature.
Recognizing Failure
Common symptoms of control valve problems include:
- Inability to adjust water temperature
- Water that’s either too hot or not hot enough
- Pilot light issues
- Slow hot water recovery
- Strange noises from the valve during operation
- Gas odors (which require immediate attention)
The Fix: Control Valve Troubleshooting and Replacement
Here’s how to repair a gas water heater with control valve issues:
1. Diagnostic checks:
-
- Verify the temperature setting is appropriate
- Check for error codes (on models with diagnostic capabilities)
- Listen for unusual clicking or humming from the valve
- Look for gas leaks using soapy water on connections (bubbles indicate leaks)
2. Recalibration: Some valves have calibration procedures to restore proper operation:
-
- Turn the temperature dial to its lowest setting
- Wait for the system to cool
- Gradually increase to the desired temperature
- Allow the system to stabilize between adjustments
3. Control valve replacement:
-
- This is one of the more complex gas water heater repairs
- Turn off gas and water supply to the heater
- Drain the tank partially (below the valve level)
- Disconnect gas line, thermocouple, and pilot tube
- Remove the old valve (typically requires a pipe wrench)
- Apply pipe joint compound to threads of the new valve
- Install and tighten the new valve
- Reconnect gas line and control components
- Refill tank and check for leaks before restoring gas supply
4. Professional consideration: Given the complexity and safety implications, control valve replacement is often best left to professionals unless you have significant plumbing and gas appliance experience.
Control valves typically cost $100-200, making this repair economic compared to full water heater replacement, but the technical difficulty is higher than other repairs covered in this guide on how to repair a gas water heater.
Problem#5. Dealing With Sediment Buildup
Sediment buildup is perhaps the most common and preventable issue affecting gas water heaters. It reduces efficiency, causes noise, and shortens heater lifespan.
What It Is and Why It Matters?
Sediment consists of minerals (primarily calcium and magnesium) that precipitate out of your water supply and settle at the bottom of the tank. This creates an insulating layer between the burner and the water, forcing the heater to work harder and longer to heat your water.
Recognizing the Problem
Signs of significant sediment buildup include:
- Popping or rumbling noises during heating cycles
- Decreased hot water capacity
- Longer recovery times after hot water use
- Higher energy bills
- Fluctuating water temperatures
The Fix: Flushing Your Water Heater
Learning how to repair a gas water heater affected by sediment starts with a proper flushing procedure:
1. Gather supplies:
-
- Garden hose long enough to reach a drain
- Bucket
- Work gloves (water may be hot)
- Pipe wrench or channel-lock pliers
2. Preparation:
-
- Turn off the gas supply
- Turn off the cold water supply to the heater
- Let the water cool if possible, or proceed carefully
3. Draining process:
-
- Connect a garden hose to the drain valve near the bottom of the tank
- Place the other end in a drain or bucket
- Open a hot water faucet somewhere in your house (this prevents vacuum formation)
- Open the drain valve and allow water to flow
- Continue until water runs clear of sediment
4. Enhanced cleaning:
-
- For stubborn sediment, close the drain valve after partial draining
- Turn on the cold water supply briefly to stir up sediment
- Drain again until clear
- Repeat if necessary
5. Refilling:
-
- Close the drain valve
- Disconnect the hose
- Keep the hot water faucet open
- Turn on the cold water supply
- Allow tank to fill until water flows steadily from the open faucet
- Close the faucet and restore gas supply
6. Regular maintenance: Flush your water heater annually to prevent significant sediment buildup, especially in areas with hard water.
This maintenance procedure is critical for extending your water heater’s lifespan and maintaining efficiency. It’s a fundamental skill for anyone interested in how to repair a gas water heater or preventing the need for more serious repairs.
Problem#6. Temperature And Pressure Relief Valve
The temperature and pressure relief (T&P) valve is a critical safety component that prevents dangerous pressure buildup in your water heater.
What It Is and What It Does?
The T&P valve automatically releases water when either the temperature or pressure inside the tank exceeds safe levels. This prevents potential tank rupture or explosion, which could cause serious injury or property damage.
Recognizing Failure
Signs of T&P valve problems include:
- Water leaking from the valve
- No water discharge when the test lever is lifted
- Constant water discharge
- Corrosion around the valve
- Unusual noises (hissing or whistling) from the valve
The Fix: Testing and Replacing the T&P Valve
Here’s how to repair a gas water heater with T&P valve issues:
- Testing the valve:
-
- Place a bucket under the discharge pipe
- Lift the test lever briefly and release
- Water should flow when lifted and stop completely when released
- If no water flows or it continues dripping, replacement is needed
2. Replacement procedure:
-
- Turn off gas and cold water supply
- Drain water to below the valve level
- Remove the discharge pipe
- Unscrew the old valve (may require significant force)
- Apply pipe tape or compound to the threads of the new valve
- Install the new valve, ensuring it’s oriented correctly
- Reconnect the discharge pipe
- Restore water supply and check for leaks
- Restore gas supply and allow heater to reach normal temperature
3. Safety considerations:
-
- Always ensure the discharge pipe directs water downward to within 6 inches of the floor
- Never cap or plug a T&P valve or its discharge pipe
- Use only valves rated for water heaters (typically 150 psi, 210°F)
The T&P valve is one of the most important safety devices on your water heater, making this repair particularly important for safe operation.
The Essential Skill You Should Know: How to Drain a Water Heater Properly
Many gas water heater repairs and maintenance procedures require draining the tank. Knowing how to do this correctly is fundamental to how to repair a gas water heater of any type.
When Draining is Necessary
You’ll need to drain your water heater:
- During annual maintenance to remove sediment
- Before replacing components like the anode rod or heating elements
- When troubleshooting certain problems
- Before moving the water heater
- When shutting down the system for extended periods
The Complete Draining Process
Follow these steps for a proper drain:
- Turn off the power source: For gas water heaters, turn the gas valve to the “Pilot” or “Off” position.
- Shut off the cold water supply: Close the cold water inlet valve on top of the heater.
- Relieve pressure: Open a hot water faucet somewhere in your home and leave it running. This prevents vacuum formation in the lines.
- Connect a garden hose: Attach a garden hose to the drain valve at the bottom of the tank. Route the other end to a floor drain, sump pump, or outside (if above basement level).
- Open the drain valve: Turn the valve handle or use a flathead screwdriver to open the valve, depending on your model.
- Allow complete drainage: Let the tank empty completely. This might take 20-30 minutes depending on tank size and drain valve diameter.
- Flush the tank (optional): For maintenance draining, turn on the cold water supply briefly with the drain valve open to flush out remaining sediment.
- Close the drain valve: Once draining is complete, close the drain valve securely.
- Refill the tank: Close all hot water faucets in the house except one. Turn on the cold water supply and allow the tank to fill completely. You’ll know it’s full when water flows steadily from the open faucet.
- Restore power: Only after the tank is completely full, restore gas to the water heater and relight according to the manufacturer’s instructions.
Troubleshooting Draining Problems
Common issues during draining include:
- Clogged drain valve: If water flows slowly or stops, the drain valve may be clogged with sediment. Try closing and reopening the valve several times, or carefully insert a wire to dislodge debris.
- Vacuum lock: If water won’t drain despite an open valve, ensure a hot water faucet is open in the house to allow air into the system.
- Leaking drain valve: If the valve drips after closing, it may need replacement. This relatively simple repair involves draining the tank, removing the old valve, and installing a new one.
Knowing how to properly drain your water heater is an essential skill for anyone learning how to repair a gas water heater and performing regular maintenance.
Final Thoughts
Learning how to repair a gas water heater empowers you to maintain this essential home appliance efficiently and economically. From simple pilot light ignition to more complex thermocouple replacement and tank flushing, the skills covered in this guide will serve you well throughout your water heater’s lifespan.
Remember that prevention is always easier than repair. Establish a regular maintenance schedule that includes annual flushing, anode rod inspection, and safety checks to maximize your water heater’s lifespan and efficiency.
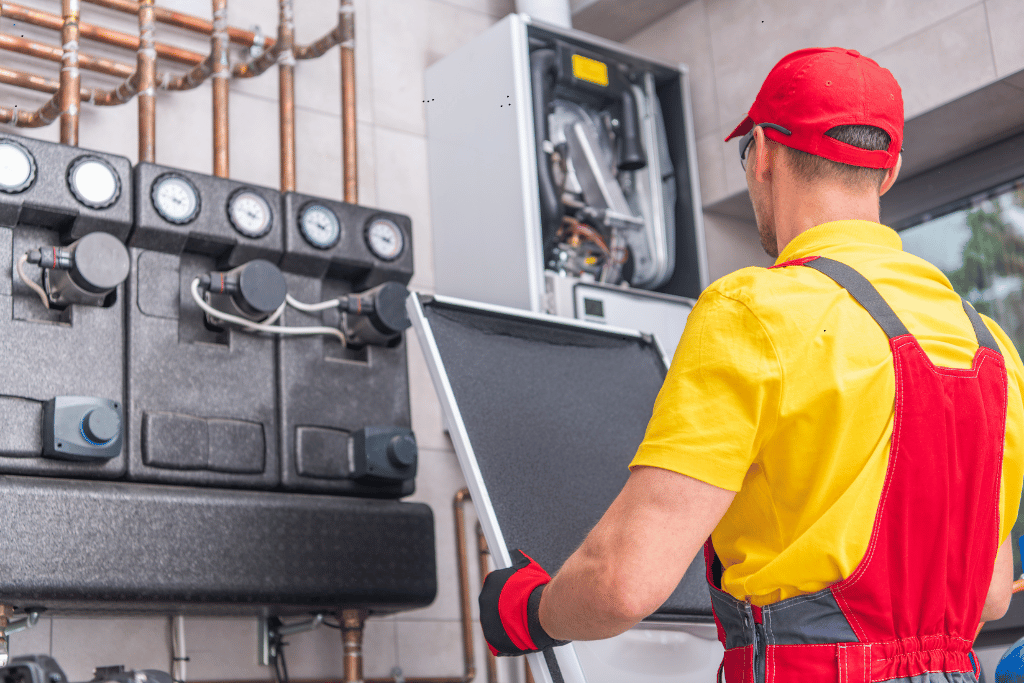
For those in Miami, Florida who prefer to leave water heater maintenance and repairs to the professionals, Sunny Bliss offers comprehensive plumbing services throughout the Miami area.
Our technicians are specially trained in all aspects of how to repair a gas water heater and can handle everything from routine maintenance to complex repairs and new installations. With decades of combined experience, our team ensures your hot water flows reliably year-round. You can give us a call on 305-990-1399 and we’ll take care of your plumbing problems.